之前我们学习的组件都是自定义了一个StatelessWidget 组件来进行学习的,但是那样的页面是静态的,不能动态改变,如果我们想要实现点击按钮,让页面上的值进行改变,我们需要用到StatefulWidget 组件来实现。这是一个有状态组件,可以刷新页面的状态
比如我们点击按钮,上数字增加
1
2
3
4
5
6
7
8
9
10
11
12
13
14
15
16
17
18
19
20
21
22
23
24
25
26
27
28
29
30
31
32
33
34
35
36
37
38
39
40
void main() { runApp(MaterialApp( home: Scaffold( appBar: AppBar(title: const Text("你好Flutter" )), body: const MyHomePage()), )); } class MyHomePage extends StatefulWidget const MyHomePage({super .key}); @override State<MyHomePage> createState() => _MyHomePageState(); } class _MyHomePageState extends State <MyHomePage > int _count = 0 ; @override Widget build(BuildContext context) { return Center( child: Column(mainAxisAlignment: MainAxisAlignment.center, children: [ Text( "$_count " , style: Theme.of(context).textTheme.headline2, ), const SizedBox( height: 60 , ), ElevatedButton( onPressed: () { setState(() { _count++; }); }, child: const Text("增加数据" )) ]), ); } }
实现一个动态增加的列表,如下图
1
2
3
4
5
6
7
8
9
10
11
12
13
14
15
16
17
18
19
20
21
22
23
24
25
26
27
28
29
30
31
32
33
34
35
36
37
void main() { runApp(const MaterialApp( home: MyHomePage(), )); } class MyHomePage extends StatefulWidget const MyHomePage({super .key}); @override State<MyHomePage> createState() => _MyHomePageState(); } class _MyHomePageState extends State <MyHomePage > final List <String > _list = ["我是原来的数据" ]; @override Widget build(BuildContext context) { return Scaffold( appBar: AppBar(title: const Text("你好Flutter" )), floatingActionButton: FloatingActionButton( onPressed: () { setState(() { _list.add("我是新增数据" ); }); }, child: const Icon(Icons.add), ), body: ListView( children: _list .map((e) => ListTile( title: Text(e), )) .toList(), )); } }
Scaffold 组件属性 bottomNavigationBar 自定义底部导航 items List底部导航条按钮集合iconSize 配置菜单大小currentlridex 默认选中第几个onTap 选中变化回调函数fixedColor 选中的颜色type
BottomNavigationBarType.fixed 如果底部有4个或4个以上的菜单,就要配置这个,否则会被挤掉BottomNavigationBarType.shifting
下图是点击导航栏切换的演示图
1
2
3
4
5
6
7
8
9
10
11
12
13
14
15
16
17
18
19
20
21
22
23
24
25
26
27
28
29
30
31
32
33
34
35
36
37
38
39
40
41
42
43
44
45
46
47
48
49
50
51
52
53
54
55
56
57
58
59
60
61
62
63
64
65
66
67
68
69
70
71
import 'package:flutter/material.dart' ;void main() { runApp(MaterialApp( title: "Flutter Demo" , theme: ThemeData(primaryColor: Colors.blue), home: const MyHomePage(), )); } class MyHomePage extends StatelessWidget const MyHomePage({super .key}); @override Widget build(BuildContext context) { return const Tabs(); } } class Tabs extends StatefulWidget const Tabs({super .key}); @override State<Tabs> createState() => _TabsState(); } class _TabsState extends State <Tabs > int currentindex = 1 ; final List <Widget> _pages = const [MyCategory(), Myhome(), MySettings()]; @override Widget build(BuildContext context) { return Scaffold( appBar: AppBar( title: const Text("Flutter App" ), ), body: _pages[currentindex], bottomNavigationBar: BottomNavigationBar( onTap: (index) { setState(() { currentindex = index; }); }, currentIndex: currentindex, items: const [ BottomNavigationBarItem(icon: Icon(Icons.category), label: "分类" ), BottomNavigationBarItem(icon: Icon(Icons.home), label: "主页" ), BottomNavigationBarItem(icon: Icon(Icons.settings), label: "设置" ), ]), ); } } class Myhome extends StatelessWidget const Myhome({super .key}); @override Widget build(BuildContext context) { return const Text("这个是home页面" ); } } class MyCategory extends StatelessWidget const MyCategory({super .key}); @override Widget build(BuildContext context) { return const Text("这个是category页面" ); } } class MySettings extends StatelessWidget const MySettings({super .key}); @override Widget build(BuildContext context) { return const Text("这个是Settings页面" ); } }
通过floatingActionButton来实现一个导航栏中间突起的圆形按钮,在上面导航栏的代码上直接进行修改,效果入下图
1
2
3
4
5
6
7
8
9
10
11
12
13
14
15
16
17
18
19
20
21
22
23
24
25
26
27
28
29
30
31
32
33
34
35
36
37
38
39
40
41
42
43
44
45
class _TabsState extends State <Tabs > int currentindex = 1 ; final List <Widget> _pages = const [MyCategory(), Myhome(), MySettings()]; @override Widget build(BuildContext context) { return Scaffold( appBar: AppBar( title: const Text("Flutter App" ), ), body: _pages[currentindex], bottomNavigationBar: BottomNavigationBar( onTap: (index) { setState(() { currentindex = index; }); }, currentIndex: currentindex, items: const [ BottomNavigationBarItem(icon: Icon(Icons.category), label: "分类" ), BottomNavigationBarItem(icon: Icon(Icons.home), label: "主页" ), BottomNavigationBarItem(icon: Icon(Icons.settings), label: "设置" ), ]), floatingActionButton: Container( height: 60 , width: 60 , padding: const EdgeInsets.all(2 ), margin: const EdgeInsets.only(top: 6 ), decoration: BoxDecoration( color: Colors.white, borderRadius: BorderRadius.circular(30 ), ), child: FloatingActionButton( backgroundColor: currentindex == 1 ? Colors.blue : Colors.yellow, onPressed: () { setState(() { currentindex = 1 ; }); }, child: const Icon(Icons.add), ), ), floatingActionButtonLocation: FloatingActionButtonLocation.centerDocked, ); } }
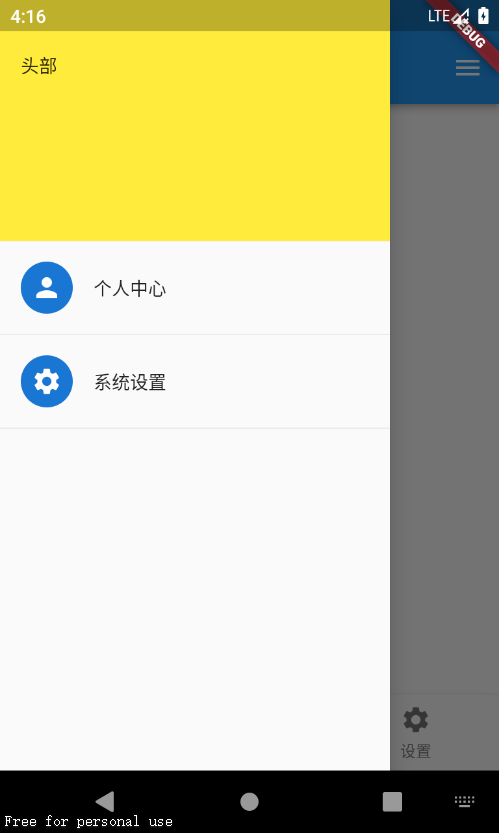
Drawer侧边栏 Flutter 中通过 drawer 可以配置左侧侧边栏,endDrawer来配置右侧侧边栏,如果没有设置 AppBar 的 leading 属性,则当使用 Drawer 的时候会自动显示一个 IconButton 来告诉用户有侧边栏(在 Android 上通常是显示为三个横的图标)
Drawer 组件的属性
backgroundColor 整个Drawer的背景颜色elevation 设置 z 轴的 elevation,和父容器相关,阴影的部分width 画出来侧边栏的宽度child 子组件
在侧边栏Drawer 组件中,可以在child中放一个ListView 组件或者Column 组件来设置自己的布局,我们会在列组件的children 属性中放一个 DrawerHeader 组件,设置侧边栏的头部。 我们还有一个 UerAccountDrawerHeader 组件,可以快速形成一个个人名片样子的侧边栏头部。
DrawerHeader 组件的属性
decoration 设置顶部颜色背景图片等margin 外边距padding 内边距child 子元素
UerAccountDrawerHeader 组件的属性
decoration 设置顶部背景颜色accountName 账户名称accountEmail 账户邮箱 currentAccountPicture 用户头像otherAccountsPictures 用来设置当前账户其他账户头像onDetailsPressed 点击监听margin 外边距
1
2
3
4
5
6
7
8
9
10
11
12
13
14
15
16
17
18
19
20
21
22
23
24
25
26
27
28
29
30
31
32
33
34
35
36
37
38
39
40
41
42
43
44
45
46
47
48
49
50
51
52
53
54
55
56
57
58
59
60
61
62
63
64
65
66
67
68
69
70
71
72
73
74
75
76
77
78
79
80
81
82
83
84
85
86
87
88
89
90
91
92
93
94
95
96
97
98
99
100
101
102
103
104
105
106
107
108
import 'package:flutter/material.dart' ;void main() { runApp(MaterialApp( title: "Flutter Demo" , theme: ThemeData(primaryColor: Colors.blue), home: const MyHomePage(), )); } class MyHomePage extends StatelessWidget const MyHomePage({super .key}); @override Widget build(BuildContext context) { return const Tabs(); } } class Tabs extends StatefulWidget const Tabs({super .key}); @override State<Tabs> createState() => _TabsState(); } class _TabsState extends State <Tabs > int currentindex = 1 ; final List <Widget> _pages = const [MyCategory(), Myhome(), MySettings()]; @override Widget build(BuildContext context) { return Scaffold( appBar: AppBar( title: const Text("Flutter App" ), ), drawer: Drawer( width: 300 , semanticLabel: "sdfsdfsdfsdf" , child: Column( children: const [ SizedBox( width: double .infinity, child: DrawerHeader( decoration: BoxDecoration(color: Colors.yellow), duration: Duration (seconds: 20 ), child: Text("头部" )) ), ListTile( leading: CircleAvatar(child: Icon(Icons.person)), title: Text("个人中心" ), ), Divider(), ListTile( leading: CircleAvatar(child: Icon(Icons.settings)), title: Text("系统设置" ), ), Divider() ], )), endDrawer: const Drawer(child: Text("右侧侧边栏" )), body: _pages[currentindex], bottomNavigationBar: BottomNavigationBar( onTap: (index) { setState(() { currentindex = index; }); }, currentIndex: currentindex, items: const [ BottomNavigationBarItem(icon: Icon(Icons.category), label: "分类" ), BottomNavigationBarItem(icon: Icon(Icons.home), label: "主页" ), BottomNavigationBarItem(icon: Icon(Icons.settings), label: "设置" ), ]), ); } } class Myhome extends StatelessWidget const Myhome({super .key}); @override Widget build(BuildContext context) { return const Text("这个是home页面" ); } } class MyCategory extends StatelessWidget const MyCategory({super .key}); @override Widget build(BuildContext context) { return const Text("这个是category页面" ); } } class MySettings extends StatelessWidget const MySettings({super .key}); @override Widget build(BuildContext context) { return const Text("这个是Settings页面" ); } }
AppBar顶部导航栏 AppBar 自定义顶部按钮图标、颜色
AppBar 的一些属性
leading 在标题前面显乐的一个控件,在首页通常显示应用的logo;在其他界面通常显示为返回按钮title 标题,通常显示为当前界面的标题文字,可以放组件actions 通常使用IconButton来表示,可以放按钮组backgroundColor 导航背景颜色iconTheme 图标样式centerTitle 标题是否居中显示bottom 通常放tabBar,标题下面显示一个Tab导航栏
1
2
3
4
5
6
7
8
9
10
11
12
13
14
15
16
17
18
19
20
21
22
23
24
25
26
27
28
29
30
31
32
33
34
35
36
37
38
39
40
41
42
43
44
45
46
47
48
49
50
51
52
53
54
55
56
57
58
59
60
import 'package:flutter/material.dart' ;void main() { runApp(MaterialApp( debugShowCheckedModeBanner: false , title: "Flutter Demo" , theme: ThemeData(primaryColor: Colors.blue), home: const MyHomePage(), )); } class MyHomePage extends StatelessWidget const MyHomePage({super .key}); @override Widget build(BuildContext context) { return const Tabs(); } } class Tabs extends StatefulWidget const Tabs({super .key}); @override State<Tabs> createState() => _TabsState(); } class _TabsState extends State <Tabs > @override Widget build(BuildContext context) { return Scaffold( appBar: AppBar( leading: IconButton( icon: const Icon(Icons.menu), onPressed: () { print ("左侧的按钮" ); }, ), title: const Text("顶部导航" ), backgroundColor: Colors.red, actions: [ IconButton( onPressed: () { print ("右侧的按钮" ); }, icon: const Icon(Icons.search)), IconButton( onPressed: () { print ("右侧的按钮" ); }, icon: const Icon(Icons.more_horiz)), ], centerTitle: true , ), body: Text("我是主页" ), ); } }
AppBar 配合 TabBar 和 TabBarView 实现滑动效果
TabBar 的一些属性
tabs 显示的标签内容,一般使用Tab对象,也可以是其它的Widgetcontroller TabController对象isScrollable 是否可以滚动indicatorColor 指示器颜色 ,指示器就是下面那个条条,指示当前选中的是哪一个indicatorWeight 指示器高度indicatorPadding 底部指示器的Paddingindicator 指示器decoration,比如边框等indicatorSize 指示器大小计算方式,
TabBarIndicatorSize.label 跟文字等宽TabBarIndicatorSize.tab 跟每个tab等宽labelColor 选中label的颜色labelStyle 选中label的StylelabelPadding 每个label的padding值unselectedLabelStyle 未选中label的StyleunselectedLabelStyle 未选中label的Style
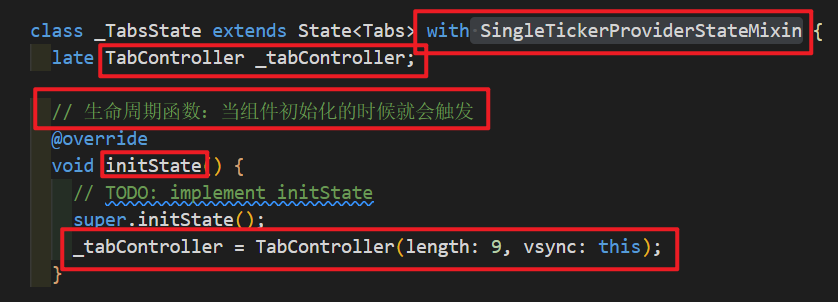
首先我们要在我们的类中 with SingleTickerProviderStateMixin 然后定义TabController 并指定它的长度
在这之后,在AppBar 的 bottom 属性中,传入TabBar 组件,并在TabBar 组件中传入刚才定义的TabController ,最后在Scaffold 的body属性中使用TabBarView 组件,也传入刚才定义的 TabController ,并在children 属性中传入想要布局的组件,注意:TabBar 的tabs 属性和 TabBarView 的chilidren 属性中的元素个数要和TabController 在定义的时候传入的一样
1
2
3
4
5
6
7
8
9
10
11
12
13
14
15
16
17
18
19
20
21
22
23
24
25
26
27
28
29
30
31
32
33
34
35
36
37
38
39
40
41
42
43
44
45
46
47
48
49
50
51
52
53
54
55
56
57
58
59
60
61
62
63
64
65
66
67
68
69
70
71
72
73
74
75
76
77
78
79
80
81
82
83
84
85
86
87
88
89
90
91
92
93
94
95
96
97
98
99
100
101
102
103
104
105
106
107
108
109
110
111
112
113
114
115
116
117
118
119
120
121
122
123
124
125
126
127
128
129
130
131
132
133
134
135
136
137
138
139
140
141
142
143
144
145
146
147
148
149
150
151
152
153
154
155
156
157
158
159
160
161
162
163
164
165
166
167
168
169
170
171
172
173
174
175
void main() { runApp(MaterialApp( debugShowCheckedModeBanner: false , title: "Flutter Demo" , theme: ThemeData(primaryColor: Colors.blue), home: const MyHomePage(), )); } class MyHomePage extends StatelessWidget const MyHomePage({super .key}); @override Widget build(BuildContext context) { return const Tabs(); } } class Tabs extends StatefulWidget const Tabs({super .key}); @override State<Tabs> createState() => _TabsState(); } class _TabsState extends State <Tabs > with SingleTickerProviderStateMixin late TabController _tabController; @override void initState() { super .initState(); _tabController = TabController(length: 9 , vsync: this ); } @override Widget build(BuildContext context) { return Scaffold( appBar: AppBar( leading: IconButton( icon: const Icon(Icons.menu), onPressed: () { print ("左侧的按钮" ); }, ), title: const Text("顶部导航" ), backgroundColor: Colors.red, actions: [ IconButton( onPressed: () { print ("右侧的按钮" ); }, icon: const Icon(Icons.search)), IconButton( onPressed: () { print ("右侧的按钮" ); }, icon: const Icon(Icons.more_horiz)), ], centerTitle: true , bottom: TabBar( controller: _tabController, isScrollable: true , indicatorColor: Colors.white, indicatorWeight: 2 , indicatorPadding: const EdgeInsets.all(5 ), indicatorSize: TabBarIndicatorSize.label, labelColor: Colors.yellow, unselectedLabelColor: Colors.white, labelStyle: const TextStyle(fontSize: 15 ), unselectedLabelStyle: const TextStyle(fontSize: 12 ), tabs: const [ Tab( child: Text("关注" ), ), Tab( child: Text("热门" ), ), Tab( child: Text("视频" ), ), Tab( child: Text("关注" ), ), Tab( child: Text("热门" ), ), Tab( child: Text("视频" ), ), Tab( child: Text("关注" ), ), Tab( child: Text("热门" ), ), Tab( child: Text("视频" ), ), ]), ), body: TabBarView(controller: _tabController, children: [ Container( child: ListView( children: const [ ListTile( title: Text("我是关注container列表" ), ) ], ), ), ListView( children: const [ ListTile( title: Text("我是视频列表" ), ) ], ), ListView( children: const [ ListTile( title: Text("我是热门列表" ), ) ], ), ListView( children: const [ ListTile( title: Text("我是关注列表" ), ) ], ), ListView( children: const [ ListTile( title: Text("我是视频列表" ), ) ], ), ListView( children: const [ ListTile( title: Text("我是热门列表" ), ) ], ), ListView( children: const [ ListTile( title: Text("我是关注列表" ), ) ], ), ListView( children: const [ ListTile( title: Text("我是视频列表" ), ) ], ), ListView( children: const [ ListTile( title: Text("我是热门列表" ), ) ], ), ]), ); } }
在有底部导航栏的页面加载顶部导航栏,只需要在body挂在的页面中也使用Scaffold 组件就好了,在下面的代码中,我们还实现了获取点击的index,实际开发时,可以用这个index请求不同的数据,并且封装一个 keepAliveWrapper 用来缓存页面当前的状态。
1 2 3 4 5 6 7 8 9 10 11 12 13 14 15 16 17 18 19 20 21 22 23 24 25 26 27 28 29 30 import 'package:flutter/material.dart' ;class KeepAliveWrapper extends StatefulWidget const KeepAliveWrapper( {super .key, @required this .child, this .keepAlive = true }); final Widget? child; final bool keepAlive; @override State<KeepAliveWrapper> createState() => _KeepAliveWrapperState(); } class _KeepAliveWrapperState extends State <KeepAliveWrapper > with AutomaticKeepAliveClientMixin { @override Widget build(BuildContext context) { return widget.child!; } @override bool get wantKeepAlive => widget.keepAlive; @override void didUpdateWidget(covariant KeepAliveWrapper oldWidget) { if (oldWidget.keepAlive != widget.keepAlive) { updateKeepAlive(); } super .didUpdateWidget(oldWidget); } @override dynamic noSuchMethod(Invocation invocation) => super .noSuchMethod(invocation); }
1
2
3
4
5
6
7
8
9
10
11
12
13
14
15
16
17
18
19
20
21
22
23
24
25
26
27
28
29
30
31
32
33
34
35
36
37
38
39
40
41
42
43
44
45
46
47
48
49
50
51
52
53
54
55
56
57
58
59
60
61
62
63
64
65
66
67
68
69
70
71
72
73
74
75
76
77
78
79
80
81
82
83
84
85
86
87
88
89
90
91
92
93
94
95
96
97
98
99
100
101
102
103
104
105
106
107
108
109
110
111
112
113
114
115
116
117
118
119
120
121
122
123
124
125
126
127
128
129
130
131
132
133
134
135
136
137
138
139
140
141
142
143
144
145
146
147
148
149
150
151
152
153
154
155
156
157
158
159
160
161
162
163
164
165
166
167
168
169
170
171
172
173
174
175
176
177
178
179
180
181
182
183
184
185
186
187
188
189
190
191
192
193
194
195
196
197
import 'package:flutter/material.dart' ;import './keepAliveWrapper.dart' ;void main() { runApp(MaterialApp( debugShowCheckedModeBanner: false , title: "Flutter Demo" , theme: ThemeData(primaryColor: Colors.blue), home: const MyHomePage(), )); } class MyHomePage extends StatelessWidget const MyHomePage({super .key}); @override Widget build(BuildContext context) { return const Tabs(); } } class Tabs extends StatefulWidget const Tabs({super .key}); @override State<Tabs> createState() => _TabsState(); } class _TabsState extends State <Tabs > int currentindex = 1 ; final List <Widget> _pages = const [MyCategory(), Myhome(), MySettings()]; @override Widget build(BuildContext context) { return Scaffold( appBar: AppBar( title: const Text("Flutter App" ), backgroundColor: Colors.red, ), body: _pages[currentindex], bottomNavigationBar: BottomNavigationBar( onTap: (index) { setState(() { currentindex = index; }); }, currentIndex: currentindex, items: const [ BottomNavigationBarItem(icon: Icon(Icons.category), label: "分类" ), BottomNavigationBarItem(icon: Icon(Icons.home), label: "主页" ), BottomNavigationBarItem(icon: Icon(Icons.settings), label: "设置" ), ]), ); } } class Myhome extends StatefulWidget const Myhome({super .key}); @override State<Myhome> createState() => _MyhomeState(); } class _MyhomeState extends State <Myhome > with SingleTickerProviderStateMixin late TabController _tabController; @override void initState() { super .initState(); _tabController = TabController(length: 3 , vsync: this ); } @override void dispose() { super .dispose(); _tabController.dispose(); print ("销毁了" ); } @override Widget build(BuildContext context) { return Scaffold( appBar: PreferredSize( preferredSize: const Size.fromHeight(40 ), child: AppBar( elevation: 1 , title: SizedBox( height: 40 , child: TabBar( controller: _tabController, indicatorColor: Colors.red, labelStyle: const TextStyle(fontSize: 15 ), labelColor: Colors.red, unselectedLabelColor: Colors.black, unselectedLabelStyle: const TextStyle(fontSize: 12 ), onTap: (index) { print (index); }, tabs: const [ Tab( child: Text("关注" ), ), Tab( child: Text("热门" ), ), Tab( child: Text("视频" ), ), ]), ), backgroundColor: Colors.white, centerTitle: true , ), ), body: TabBarView(controller: _tabController, children: [ KeepAliveWrapper( child: ListView( children: const [ ListTile( title: Text("我是关rntainer列表" ), ), ListTile( title: Text("我1ntai3表" ), ), ListTile( title: Text("我是2ontainer列表" ), ), ListTile( title: Text("我是关注contterhhh表" ), ), ListTile( title: Text("我是关注container列表" ), ), ListTile( title: Text("我是关注2iner列表" ), ), ListTile( title: Text("我是关注contai123ner列表" ), ), ListTile( title: Text("我是关注c12列表" ), ), ListTile( title: Text("我是关注2iner列表" ), ), ListTile( title: Text("我是关注contai123ner列表" ), ), ListTile( title: Text("我是关注c12列表" ), ), ], ), ), ListView( children: const [ ListTile( title: Text("我是热门列表" ), ) ], ), ListView( children: const [ ListTile( title: Text("我是关注列表" ), ) ], ) ]), ); } } class MyCategory extends StatelessWidget const MyCategory({super .key}); @override Widget build(BuildContext context) { return const Text("这个是category页面" ); } } class MySettings extends StatelessWidget const MySettings({super .key}); @override Widget build(BuildContext context) { return const Text("这个是Settings页面" ); } }
Flutter 中的路由 Flutter中的路由通俗的讲就是页面跳转。在Flutter中通过Navigator 组件管理路由导航并提供了管理堆栈的方法。如:Navigator.push和Navigator.pop 。Flutter中给我们提供了两种配置路由跳转的方式:1、基本路由2、命名路由
普通路由的使用 在主页定义一个按钮,点击后跳转到别的页面并传值,然后在其它页面中点击返回
1 2 3 4 5 6 7 8 9 10 11 12 13 14 15 16 17 18 19 20 21 22 23 24 25 26 27 28 29 30 31 32 33 34 import 'package:flutter/material.dart' ;class FormPage extends StatefulWidget final String title; const FormPage({super .key, required this .title}); @override State<FormPage> createState() => _FormPageState(); } class _FormPageState extends State <FormPage > @override void initState() { super .initState(); print (widget.title); } @override Widget build(BuildContext context) { return Scaffold( floatingActionButton: FloatingActionButton( onPressed: () => Navigator.pop(context), child: const Icon(Icons.home), ), appBar: AppBar( title: Text(widget.title), ), body: const Center(child: Text("我是表单页面" )), ); } }
1 2 3 4 5 6 7 8 9 10 11 12 13 14 15 16 17 18 19 20 21 22 23 import 'package:flutter/material.dart' ;class SearchPage extends StatefulWidget const SearchPage({super .key}); @override State<SearchPage> createState() => _SearchPageState(); } class _SearchPageState extends State <SearchPage > @override Widget build(BuildContext context) { return Scaffold( appBar: AppBar( title: const Text("搜索页面标题" ), ), body: const Center( child: Text("搜索页面" ), ), ); } }
1
2
3
4
5
6
7
8
9
10
11
12
13
14
15
16
17
18
19
20
21
22
23
24
25
26
27
28
29
30
31
32
33
34
35
36
37
38
39
40
41
42
43
44
45
46
47
48
49
50
51
52
53
54
55
56
57
58
59
60
61
62
63
64
65
66
67
68
69
70
71
72
73
74
75
76
77
78
79
80
81
82
83
84
85
86
87
88
89
90
91
92
93
94
import 'package:flutter/material.dart' ;import './search.dart' ;import './form.dart' ;void main() { runApp(MaterialApp( debugShowCheckedModeBanner: false , title: "Flutter Demo" , theme: ThemeData(primaryColor: Colors.blue), home: const MyHomePage(), )); } class MyHomePage extends StatelessWidget const MyHomePage({super .key}); @override Widget build(BuildContext context) { return const Tabs(); } } class Tabs extends StatefulWidget const Tabs({super .key}); @override State<Tabs> createState() => _TabsState(); } class _TabsState extends State <Tabs > int currentindex = 1 ; final List <Widget> _pages = const [MyCategory(), MySettings()]; @override Widget build(BuildContext context) { return Scaffold( appBar: AppBar( title: const Text("Flutter App" ), backgroundColor: Colors.red, ), body: _pages[currentindex], bottomNavigationBar: BottomNavigationBar( onTap: (index) { setState(() { currentindex = index; }); }, currentIndex: currentindex, items: const [ BottomNavigationBarItem(icon: Icon(Icons.category), label: "分类" ), BottomNavigationBarItem(icon: Icon(Icons.settings), label: "设置" ), ]), ); } } class MyCategory extends StatelessWidget const MyCategory({super .key}); @override Widget build(BuildContext context) { return const Text("这个是category页面" ); } } class MySettings extends StatelessWidget const MySettings({super .key}); @override Widget build(BuildContext context) { return Center( child: Column( mainAxisAlignment: MainAxisAlignment.center, children: [ ElevatedButton( onPressed: () { Navigator.of(context) .push(MaterialPageRoute(builder: (BuildContext context) { return const SearchPage(); })); }, child: const Text("点击搜索" )), ElevatedButton( onPressed: () { Navigator.of(context) .push(MaterialPageRoute(builder: (BuildContext context) { return const FormPage(title: "传过来的值呀" ); })); }, child: const Text("点击到表单" )) ], ), ); } }
命名路由 为了方便管理我们的路由,我们还可以使用命名路由
首先在main.dart 中将我们的页面全部引入,然后在MaterialApp 组件中有一个routes 属性,在这里面配置路由的名称,最后再使用就好了
1 2 3 4 5 6 7 8 9 10 11 12 13 14 15 16 17 18 19 20 21 22 23 24 25 26 27 28 29 30 import 'package:flutter/material.dart' ;class SearchPage extends StatefulWidget final Map arguments; const SearchPage({super .key, required this .arguments}); @override State<SearchPage> createState() => _SearchPageState(); } class _SearchPageState extends State <SearchPage > @override void initState() { super .initState(); print (widget.arguments); } @override Widget build(BuildContext context) { return Scaffold( appBar: AppBar( title: const Text("搜索页面标题" ), ), body: const Center( child: Text("搜索页面" ), ), ); } }
1
2
3
4
5
6
7
8
9
10
11
12
13
14
15
16
17
18
19
20
21
22
23
24
25
26
27
28
29
30
31
32
33
34
35
36
37
38
39
40
41
42
43
44
45
46
47
48
49
50
51
52
53
54
55
56
57
58
59
60
61
62
63
64
65
66
67
68
69
70
71
72
73
74
75
76
77
78
79
80
81
82
83
84
85
86
87
88
89
90
91
92
93
94
95
96
97
98
99
100
101
102
103
104
105
106
107
108
109
110
111
112
113
import 'package:flutter/material.dart' ;import './search.dart' ;void main() { runApp(MyApp()); } class MyApp extends StatelessWidget MyApp({super .key}); Map routes = { '/' : (context) => const Tabs(), '/search' : (context, {arguments}) => SearchPage( arguments: arguments, ) }; @override Widget build(BuildContext context) { return MaterialApp( debugShowCheckedModeBanner: false , title: "Flutter Demo" , theme: ThemeData(primaryColor: Colors.blue), initialRoute: "/" , onGenerateRoute: (RouteSettings settings) { final String? name = settings.name; final Function? pageContentBuilder = routes[name]; if (pageContentBuilder != null ) { if (settings.arguments != null ) { final Route route = MaterialPageRoute( builder: (context) => pageContentBuilder(context, arguments: settings.arguments)); return route; } else { final Route route = MaterialPageRoute( builder: (context) => pageContentBuilder(context)); return route; } } return null ; }, ); } } class Tabs extends StatefulWidget const Tabs({super .key}); @override State<Tabs> createState() => _TabsState(); } class _TabsState extends State <Tabs > int currentindex = 1 ; final List <Widget> _pages = const [MyCategory(), MySettings()]; @override Widget build(BuildContext context) { return Scaffold( appBar: AppBar( title: const Text("Flutter App" ), backgroundColor: Colors.red, ), body: _pages[currentindex], bottomNavigationBar: BottomNavigationBar( onTap: (index) { setState(() { currentindex = index; }); }, currentIndex: currentindex, items: const [ BottomNavigationBarItem(icon: Icon(Icons.category), label: "分类" ), BottomNavigationBarItem(icon: Icon(Icons.settings), label: "设置" ), ]), ); } } class MyCategory extends StatelessWidget const MyCategory({super .key}); @override Widget build(BuildContext context) { return const Text("这个是category页面" ); } } class MySettings extends StatelessWidget const MySettings({super .key}); @override Widget build(BuildContext context) { return Center( child: Column( mainAxisAlignment: MainAxisAlignment.center, children: [ ElevatedButton( onPressed: () => Navigator.pushNamed(context, '/search' , arguments: { "name" : "sdfsdf" , "chuan" : 1 , }), child: const Text("命名路由search" ), ) ], ), ); } }
Flutter返回上一级路由 1 Navigator.of(context).pop();
Flutter中替换路由 比如我们从用户中心页面跳转到了registerFirst页面,然后从registerFirst页面通过pushReplacementNamed跳转到了registerSecond页面。这个时候当我们点击registerSecond的返回按钮的时候它会直接返回到用户中心。
1 Navigator.of(context).pushReplacementNamed('/registersecond' );
Flutter返回到根路由 比如我们从用户中心跳转到registerFirsti顷面,然后从registerFirsti顷面跳转到registerSecond页面,然后从registerSecond跳转到了registerThird页面。这个时候我们想的是registerThird注册成功后返回到用户中心。这个时候就用到了返回到根路由的方法。
1
2
3
4
5
Navigator.of(context).pushAndRemoveUntil( MaterialPageRoute(builder:(BuildContext context){ return const Tabs(); })/MaterialPageRoute (route)=false );
同样风格的路由跳转 Material组件库中提供了一个MaterialPageRoute 组件,它可以使用和平台风格一致的路由切换动画,如在iOS上会左右滑动切换,而在Android上会上下滑动切换,CupertinoPageRoute 是Cupertino组件库提供的iOS风格的路由切换组件如果在Android上也想使用左右切换风格,可以使用CupertinoPageRoute .
引入 import 'package:flutter/cupertino.dart'
MaterialPageRoute 改为CupertinoPageRoute
全局配置主题 1 2 3 4 5 6 7 8 9 10 11 12 return MaterialApp( debugshowcheckedModeBanner:false , title:'Flutter Demo' , theme:ThemeData( primaryswatch:Colors.blue, appBarTheme:const AppBarTheme( centerTitle:true , ) ), initialRoute:"/" , onGenerateRoute:onGenerateRoute, );
Dialog组件 警告弹窗 1 2 3 4 5 6 7 8 9 10 11 12 13 14 15 16 17 18 19 void _alertDialog() async { var result = await showDialog(context:context,builder:(context){ return AlertDialog( title:const Text("提示信息!" ), content:const Text("您确定要删除吗" ), actions:[ TextButton(onPressed:(){ print ("ok" ); Navigator.of(context).pop("ok" ); },child:const Text("确定" )), TextButton(onPressed:(){ print ("cancel" ); Navigator.of(context).pop("取消" ); },child:const Text("取消" )) ], ) }); print (result); }
选择框 1 2 3 4 5 6 7 8 9 10 11 12 13 14 15 16 17 18 19 20 21 22 23 24 25 var _simpleDialog() async { var result = await showDialog(context:context,builder:(context){ return SimpleDialog( barrierDismissible:false , title:Text("请求选择语言" ) children:[ SimpleDialogOption( onPressed:(){ print ("汉语" ); Navigator.of(context).pop("汉语" ); } child:Text("汉语" ), ), SimpleDialogOption( onPressed:(){ print ("英语" ); Navigator.of(context).pop("英语" ); } child:Text("英语" ), ), ], ); }); print (result); }
底部弹窗 1 2 3 4 5 6 7 8 9 10 11 12 13 14 15 16 17 18 19 20 21 22 23 24 25 void _modelBottomSheet() async { var result = await showModalBottomSheet(context:context,builder:(context){ return Container( child:Column( childre:[ ListTile( title:Text("分享" ); onTap:(){ print ("分享" ); Navigator.of(context).pop("分享" ); } ), ListTile( title:Text("收藏" ); onTap:(){ print ("收藏" ); Navigator.of(context).pop("收藏" ); } ), ] ), ); }); print (result); }
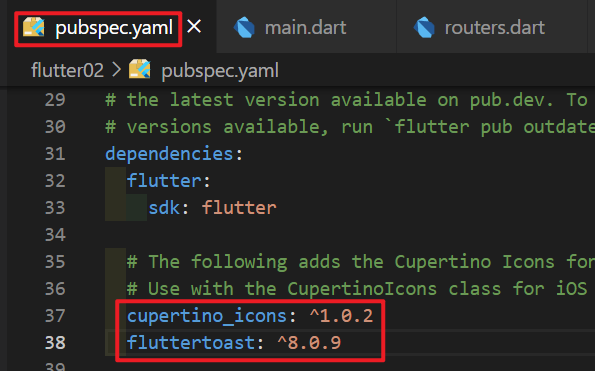
fluttertoast 提示信息 这个是第三方库,我们可以去官网进行安装使用
在pubspec.yaml 文件中配置插件后,运行 flutter pub get 命令就可以进行下载
1 2 3 4 5 6 7 8 9 10 11 12 13 14 15 import 'package:fluttertoast/fluttertoast.dart' ; void _toast(){ Fluttertoast.showToast( msg:"This is Center Short Toast" , toastLength:Toast.LENGTH_SHORT, gravity:ToastGravity.CENTER, timeInSecForIosWeb:1 , toastLength:Toast.LENGTH_SHORT, backgroundColor:Colors.red, textColor:Colors.white, fontsize:16.0 ); }
自定义Dialog 1 2 3 4 5 6 7 8 9 10 11 12 13 14 15 16 17 18 19 20 21 22 23 24 25 26 27 28 29 30 31 32 33 34 35 36 37 38 39 40 41 42 43 44 45 46 47 48 49 50 51 52 53 54 55 56 class MyDialog extends Dialog final String title; final String content; final Function? onTap; const MyDialog({key?key,required this .title,required this .content,required this .onTap}):super (key:key); Widget build(BuildContext context){ return Material( type:MaterialType.transparency, child:Center( child:Container( height:300 , width:300 , color:Colors.white, child:Column( children:[ Padding( padding:const EdgInsets.all(5 ), child:Stack( children:[ Align( alignment:Alignment.centerLeft, child:Text(this .title), ), Align( alignment:Alignment.centerLeft, child:InkWell( onTap:onTap, child:Icon(Icons.close), ), ), ] ) ), Divider(), Container( width:double .infinity, child:Text(this .content), ) ] ) ) ) ) } } void _myDialog(){ showDialog(context:context,builder:(context){ return MyDialog(title:"提示" ,content:"我是内容" onTap:(){ print ("点了" ); }); }) }
PageView组件 通过PageView组件可以实现类似于抖音的上下滑动切换的功能
1 2 3 4 5 6 7 8 9 10 11 12 13 14 PageView( scrollDirection:Axis.vertical onPageChanged:(index){ } children:[ Center( child:Text("第一个" ) ), Center( child:Text("第二个" ) ) ] )
我们也可以使用 PaveView.builder 来生成我们的PageView ,在PaveView 外套一个SizedBox 来控制高度
给组件with AutomaticKeepAliveClientMixin 并重写 wantKeepAlive 函数返回true缓存页面
Flutter 中的 Key 我们平时一定接触过很多的Widget,比如Container 、Row 、Column 等,它们在我们绘制界面的过程中发挥着重要的作用。但是不知道你有没有注意到,在几乎每个Widget的构造函数中,都有一个共同的参数,它们通常在参数列表的第一个,那就是Key,在Flutter中,Key是不能重复使用的,所以Key一般用来做唯一标识。组件在更新的时候,其状态的保存主要是通过判断组件的类型或者key值是否一致 。因此,当各组件的类型不同的时候,类型已经足够用来区分不同的组件了,此时我们可以不必使用key。但是如果同时存在多个同一类型的控件的时候,此时类型已经无法作为区分的条件了,我们就需要使用到key。
Flutter key 子类包含LocalKey 和GlobalKey .
局部键(LocalKey):ValueKey、ObjectKey、UniqueKey
UniqueKey,唯一值,每次运行的时候会随机生成
ValueKey,指定一个数作为key
全局键(GlobalKey):GlobalKey、GlobalObjectKey
通过globalKey.currentState 可以获取到该元素的状态
AnimatedList AnimatedList和ListView的功能大体相似,不同的是,AnimatedList可以在列表中插入或删除节点
AnimatedList是一个StatefulWidget,它对应的State类型为AnimatedListState,添加和删除元素的
void insertItem()
void removeItem()1 2 3 4 5 6 7 8 9 10 11 12 13 14 15 16 17 18 19 20 21 22 23 24 25 26 27 28 29 30 31 32 33 34 35 36 List <String > list = ["1" ,"2" ];_globalKey = GlobalKey<AnimatedListState>(); list.add("新增一条数据" ); _globalKey.currentState!.insertItem(list.length-1 ); _globalKey.currentState!.removeItem(index,(context,animation){ var removeItem = list[index]; list.removeAt(index); return FadeTransition( opacity:animation, child:removeItem, ); }); AnimatedList( key:_globalKey, initialItemCount:list.length, itemBuilder:((context,index,animation){ return FadeTransition( opacity:animation, child:ListTile( title:Text(list[index]), ) ); }) ); bool flag = true if (flag){ flag = false ; Timer.peridic(Duration (millisecondes:500 ),(timer){ flag = true ; timer.cancel(); }); }
Flutter动画 动画基本原理及Flutter动画简介 动画原理
Flutteri动画简介 隐式动画 、显式动画 、自定义隐式动画 、自定义显式动画 、和Hero动画
隐式动画 通过几行代码就可以实现隐式动画,由于隐式动画背后的实现原理和繁琐的操作细节都被隐去了,所以叫隐式动画,FLutter中提供的AnimatedContainer 、AnimatedPadding 、AnimatedPositioned 、AnimatedOpacity 、AnimatedDefaultTextStyle 、AnimatedSwitcher 都属于隐式动画,隐式动画中可以通过duration配置动画时长、可以通过Curve(曲线)来配置动画过程
这几个组件其实就是对应的Container 、Padding 、Positioned 、Opacity 等组件的有动画版本,即正常我们改变形状是瞬间改变,这些组件会有一个改变的过程
1 2 3 4 5 6 7 8 9 10 11 12 13 14 15 16 17 18 19 20 21 22 23 24 25 26 27 28 29 30 31 32 33 34 35 36 37 38 39 40 41 42 43 44 45 46 47 48 void main() { runApp(const MyApp()); } class MyApp extends StatelessWidget const MyApp({super .key}); @override Widget build(BuildContext context) { return MaterialApp( title: "Flutter Demo" , theme: ThemeData(primaryColor: Colors.blue), home: const Tabs(), ); } } class Tabs extends StatefulWidget const Tabs({super .key}); @override State<Tabs> createState() => _TabsState(); } class _TabsState extends State <Tabs > bool flag = true ; @override Widget build(BuildContext context) { return Scaffold( floatingActionButton: FloatingActionButton(onPressed: () { setState(() { flag = !flag; }); }), appBar: AppBar( title: const Text("Flutter App" ), backgroundColor: Colors.red, ), body: Center( child: AnimatedContainer( duration: const Duration (seconds: 1 ), height: flag ? 200 : 300 , width: flag ? 200 : 300 , color: Colors.yellow, )), ); } }
Hero动画 微信朋友圈点击小图片的时候会有一个动画效果到大图预览,这个动画效果就可以使用Hro动画实现。Hero指的是可以在路由(页面)之间飞行”的widget,简单来说Hero动画就是在路由切换时,有一个共享的widget可以在新旧路由间切换。
使用photo_view 可以预览图片
1 import 'package:photo_view/photo_view.dart'
1 import 'package:photo_view/photo_view_gallery.dart'
Flutter Getx 状态管理 通俗的讲:当我们想在多个页面(组件Widget)之间共享状态(数据),或者一个页面(组件Widget)中的多个子组件之间供享状态(数据),这个时候我们就可以用Flutter中的状态管理来管理统一的状态(数据),实现不同组件之间的传值和数据共享。
现在Flutter的状态管理方案很多,redux、bloc、state、provider、Getx
provider是官方提供的状态管理解决方案,主要功能就是状态管理。Getx是第三方的状态管理插件,不仅具有状态管理的功能,还具有路由管理、主题管理、国际化多语言管理、Obx局部更新、网络请求、数据验证等功能,相比其他状态管理插件Geⅸ简单、功强大并且高性能。
Flutter Getx介绍 Getx以是Flutter上的一个轻量且强大的解决方案,Getx为我们提供了高性能的状态管理、智能的依赖注入和便捷的路由管理。 Getx 中文文档